Tuesday, November 23, 2010

A few things...

...I've been working on are some dresses and some shirts. I love the idea of re-using articles of clothing that otherwise would be thrown away and making them into something unique.

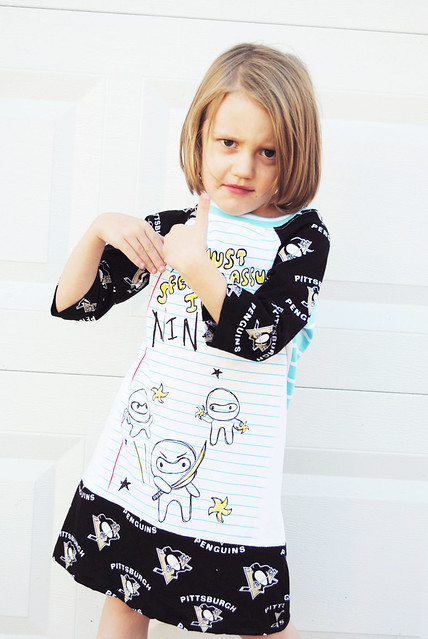
This "Ninja" Dress is my favorite of the bunch. Here Reagan is posing as a ninja. She was such a little model today. As soon as she heard the camera click she would strike a new pose and hold it until she heard it click again. I have about 60 photos just from today because she was to darn cute to make her stop.

This I think is an original. I looked online to see if anyone else had done it or something similar but couldn't find anything. It's my "I'm not a BOY!" Tee. I have a thing for mustaches right now.

And isn't my model adorable? :)

The "tie" shirt was to cute to pass up on making some. I'm loving it with some Steelers fabric. What a handsome little man.
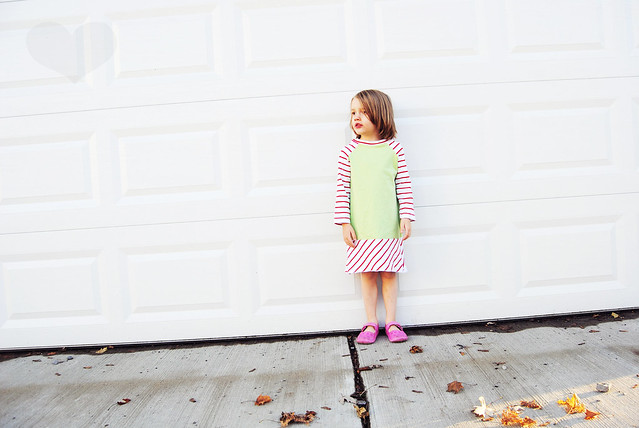
Finally, my little Christmas dress for Reagan. It for sure needs something added but not sure exactly what I want yet so this will do for now.

I ordered some fabric to make the kids some Christmas pj's this year. As soon as I get them I will whip them up and post some pictures. I don't think I've ever had my kids in Christmas pj's...EVER. So this will be extra fun. :)

Saturday, November 13, 2010

I LOVE Photoshop!


I seriously do...if I could marry it I would.

I've been playing around with textures and actions. I have a lot to learn so if anybody has any advice I would appreciate it. How do you get the perfect picture?

I'm linking here again this week...the theme is 'Smile'
Reagan has the sweetest smile :)


Friday, November 12, 2010

Friday, November 5, 2010

NightTime Light photo

(click on photo to enlarge)


This weeks challenge is Light. I chose this photo because it's not the normal nice sun burst light, (which I can't really figure out how to get right anyway) :) but it's a dusk kinda light.

This was at the free concert at the park to see the Clarks! Love them!!


Thursday, October 21, 2010

It's Fall


I have been gone way to long from the blog. Life just happens and sometimes it's all you can do to keep up with day to day life here at home.

I'll be back later with some craftyness but for now here is a picture of Reagan at the pumpkin patch with her warty pumpkin.

The Paper Mama


Saturday, September 11, 2010

One of Many Favorite Shots

(click on photo to enlarge)

She looks so innocent here doesn't she? This is a rare thing. Not so innocent but oh so fun and funny. What a crazy little girl. She can make us all laugh in a second.

I have so many favorite shots but this is in the top 5.


Wednesday, August 25, 2010

Pottery Barn Knock Off

This weeks theme on The CSI Project is Pottery Barn. I have been wanting to make this since I first saw it in the catalog but couldn't get my butt in gear.

That's what I love most about the CSI blog...it makes me get moving.

Here is my version. Pottery Barn calls them their Style Tiles. Each tile costs $35...crazy to me. So For my own board I went out and got a few things that I didn't have laying around and made the same thing just much less expensive.

Foam Board...I picked this up at my local Dollar Tree. I used $5.00 worth.

Cork...pack of 4 for $5.00

2 Dry Erase boards...$7.00 each

I used this Spray Adhesive to stick the fabric on the boards.
I already had this laying around.

My dry erase boards were thicker than the cork so I cut down the foam board to size and stuck them together.

I left 2 of the corks as is and then covered the other 2 with fabric.

Just cut it a few inches bigger than your cork tile and wrap it around back..the spray adhesive worked great for this.

I decided on 2 cork tiles, 2 dry erase tiles, 2 chalkboard tiles and 3 fabric tiles. For the chalkboard ones I used chalk cloth I picked up at Joann's a while ago...worked perfectly!

Lay out your tiles until you find an arrangement that you like.

If you want to waste a lot of time add stickies to the backs of all tiles and stick them up one at a time on the wall...then hate it and tear them down. :)

The smart thing to do is go get a piece of thin sheet board and hot glue your tiles onto that. The one I got was on sale for $10.00. It was a 4x8 I think so was able to get 2 full boards and some extra pieces. My cousin will be using the other board to make herself one. So less than $5.00 for backing.

I forgot to take a picture of me cutting the frame and making it but all I did was get some door framing, cut it to size and used some flat corner supports to put it all together.

I then hot glued the frame onto the edge of the tiles and it's done!

What do you think?

I really love it.
I still need to add some wall hanger things on the back and get it put up in the dining room.

We will be using ours for school things. I figure we can hang tests, pictures, schedules all over it and have an organized school year finally.

So for around $30.00 and stuff I had on hand I made something that if had gotten it made just how you like it at Pottery Barn would have cost you an arm and a leg. Seriously! (I watched a ton of Grey's Anatomy while my family was away)


Visit thecsiproject.com


LinkWithin

Related Posts with Thumbnails